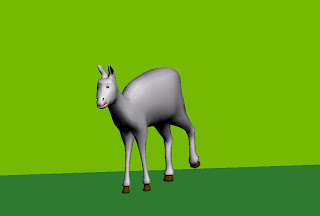
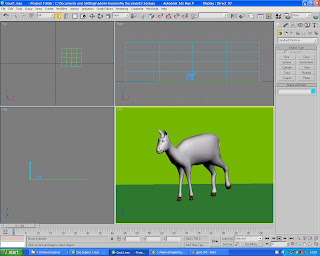
First I create a sphere on the left to create the head. Then convert the sphere into Editable Poly (right click sphere and choose Convert To>Convert To Editable Poly), next go to Modify tab, activate Vertex selection. Then change to a Polygon, selected and Edit Polygons rollout click Bevel button. Click and drag in selected polygons to create beveled polygons. For creating the jaw I clicked and used the Extrude Button. Click and drag at selected polygons twice. Change to Vertex selection and modify some vertices position. It was need to scale along X axis to narrow for making the nose.
Following on from that the Edge selection was activated. For editing the Edges rollout click Connect button to divide the edges. Change to Vertex selection and modify some vertices position.
Then I wanted to edit the Edges rollout, I clicked the Spilt button. This option will break the edges connection. For filling the gap between two Edges of mouth, I used the Polygons. Activate Polygon selection. I turned on 3D Snap Toggle to help me precisely selecting vertex later. For editing Geometry rollout click Create button. I clicked in order to create two new polygons.
For making ears and eyes because they are symmetrical, they only needed to crated on one side of the head.
First, I create the ear with Inset tool, in Edit polygon. (For dividing the edges for making the ear, I used the Connect, and used the Scale tool to widen. For creating the hollow area in ear, I used the Inset and Bevel tools.
Second I create polygon in eye area with using Inset tool. Then I used Inset. Then I changed the Edge selection. Then I select the vertical edges and move them closer to each other. At the final step for head model, I used Symmetry modifier, then I used Mirror Axis.
For body, I created 5 plane sections, and then I convert them to Editable Poly. Then I changed the section to Edge, and then I select the edge near the leg. Then, when I wanted to move the edge down, I held the shift button. I did that (Shift drag) for creating other polygons. Then after selecting the entire plane, I turned off all sub-object selection, and applied shell modifier and I moved the object away from centre. After selecting the object, I pressed right click and choose Convert To> Convert to Editable poly. Next, with using the Mirror Axis, and applying the symmetry modifier, I create the basic body of the dog.
Then I select the body object. In Modifier stack, I select the Editable Poly. Then I select the edge at the outer side of the body, and moved them down, and this made the body more rounded.
Then I created the dog’s finger, with selecting one polygon and using Scale tool.
Next I turned off all the sub-object selection, and converting the body object into Editable poly. Then in Edit Geometry rollout I clicked on Attached button then clicked the head object for combined the head and body object to one object, and connecting them together. And at last I create the tail with Polygon and Attach button.
Friday, 29 January 2010
Wednesday, 27 January 2010
Creating The Lama


To create the Lama I have used Extrude and bevel tools from the Editable Poly panel. Firstly I wanted to create Gout but now I think it looks like Lama (a new species made by Karim). It took some time I have spent time on it, and I should have done better, but for my first model it looks ok I think. To create the head, I spent lots of time on it, but it is not as good as I would like it to be. Anyway, I’m not fully satisfied with the final result, but I tried my best.
_First of all I create the head, then I made the body, then I connected them together.
_After that I tried to create the legs and tail.
_At the end I made the face, ears, mouse and etc.But that wasn’t easy for the first experience, but hopefully finished.
_First of all I create the head, then I made the body, then I connected them together.
_After that I tried to create the legs and tail.
_At the end I made the face, ears, mouse and etc.But that wasn’t easy for the first experience, but hopefully finished.
Subscribe to:
Comments (Atom)


